
Free-camping on the Gulf Islands
Free-camping is the semi-underground activity of pitching your tent outside of a designated camping area - on a beach, in a forest, up a mountain, or anywhere that you are unlikely to be bothered or bother anyone else. This guide relates some of the lessons I've learned over the years while solo free-camping on the Gulf Islands of British Columbia, for several weeks or months at a time with only my backpack, tent, and a minimal amount of gear. Most of this advice is suited for anyone interested in backpacking and tenting.
Contents:

Choosing a Destination
Choosing a Gulf Island
Camping Gear - What to Take
Camping Gear - What to Leave Behind
Getting to the Islands
Pitching Your Tent
Tent Organization and Maintenance
Fire and Cooking
Food and Refrigeration
Water Gathering, Washing and Bathing
Shellfish Foraging
Shore Fishing
Night Time
Choosing a Destination
Here are some general tips for picking a destination for your free-camping activities:
- Choose a place that is near freshwater (lake, river, creek, or civilization). You'll need easy access to water every single day for drinking, cooking, cleaning, etc. Areas near lakes and rivers are also likely to have varied vegetation, which is good for foraging. Many times small creeks won't show up on maps, but you can use Google Maps in terrain view to take some educated guesses about where water is likely to flow (look for natural drainage routes).
- Choose an area where there are forested areas to explore. Google Maps in satellite view can help you find these areas. Forested areas near the ocean are particularly good, since you can forage for shellfish right on the beach and there is the potential for fishing.
- Choose a place that's relatively safe. The Gulf Islands have no dangerous animals (eg., bears). All the islands that you can reach by BC ferry also have medical facilities. I recommend staying within a one-day hike of civilization. Ideally, it's best to have one foot in civilization and one foot in the wild, so that you can benefit from the best of both worlds. If you are too far into the woods by yourself for more than a week, you will have to deal with the problems of social isolation, finding a way to wash clothes, and finding food. If you are free-camping on private land, be sure to have the permission of the landowners.
Choosing a Gulf Island
In my experience, the islands that are best for free-camping (in order of my personal favorites) are as follows:
Hornby Island [map]
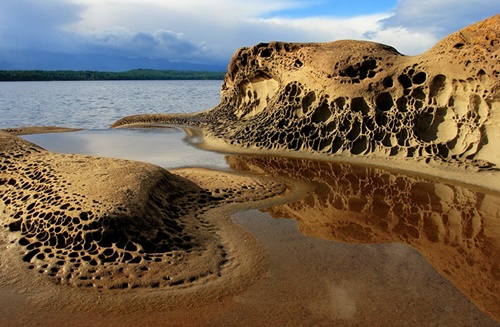
This island has its share of free spirits, party goers, and tourists that flock to the campsites scattered around the island and hang out at the Ringside market and beaches near Tribune Bay. The island has a full spectrum of beach types, ranging from sandy beaches to rocky shores and bizarrely carved sandstone. A little exploration will reveal shellfish for foraging. On the north side of the isand, some of the shallow rocky beaches can have unusually warm water on sunny days, when the sun-baked rocks meet the incoming tide. In the fall there are limitless berries for picking, particularly blackberries and salal. There is a public laundry and at least two locations with coin-operated showers. The island is a little hard to get to (see Getting to the Islands), but it's worth it. It may be challenging to find areas suitable for free-camping that also have natural freshwater nearby, but drinking water can be appropriated from official campsites and public buildings. Free wireless is available at Ford Cove (pictured below), where you'll also find a good marina hang-out. Hitching rides to get around the island in the summer is easy as pie. In a word, Horby is the socal island.
Galiano Island [map]
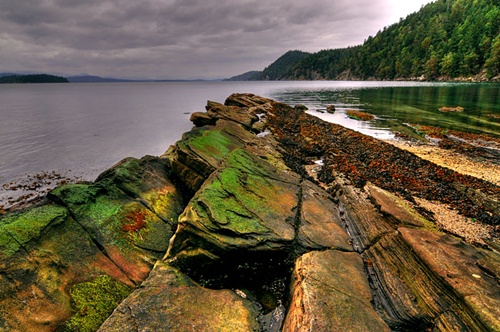
Galiano has an amazing diversity of plant and wildlife, and long stretches of scenic beaches with shellfish for foraging. There are natural freshwater sources scattered around the island. Free internet is available at a few places, including the library and Hummingbird pub, and there is a public laundry not far from the ferry dock. There are many forest paths to explore, including mazes of old, abandoned logging loads that lead to remote corners of the island. The ridges on the southwest part of the island are a good place to start exploring. The island itself is so long and thin that you could spend weeks exploring the beaches. The ferry lands you on the southern part of the island, which is interesting enough to spend weeks exploring. But you'll need some form of transportation to explore the central and more remote northern sections of the island (hitching a ride is doable). The island attracts a lot of visitors and the atmosphere is welcoming. Galiano has a good balance of basic services and wild areas (with awesome hiking trails) to explore.
Saturna Island [map]
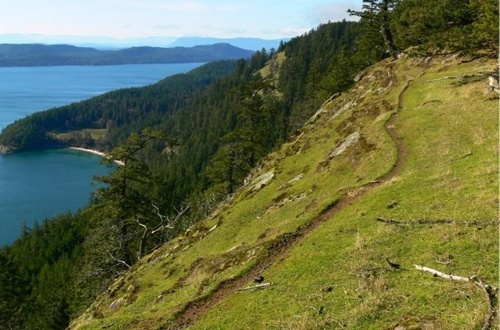
This island is small enough that you can explore it all on foot, though having a bike makes life easier. There is an inexpensive ($5/night) tenting site that opened in 2010, on the remote eastern side of the island (Narvaez Bay). The beaches are fantastic, especially the ones near this campsite. There are a variety of shellfish at the beaches, and it's not hard to spot seals and even whales from the shore. Natural freshwater sources are available but spotty. It's no problem to fill you water bottles at the general stores, though, where you also have free wireless (internet access is available in several locations). Blackberry, salmonberry, and salal bushes are scattered around the island. The drawbacks of Saturna are lack of public laundry and shower facilities, and lack of natural or public freshwater on the eastern side of the island. The island atmosphere is welcoming, but has little tourist traffic compared to the other islands mentioned. The best aspect of Saturna Island is that it has a relatively large amount of land allocated for National Parks Reserves, so there is a lot of terrain to explore. Saturna is the best island for quiet isolation and animal-trail hiking. Pictured below is a goat trail west of Cactus Point.
Camping Gear - What to Take
A good rule of thumb is that less is more. The less weight you're carrying around, the easier it will be to get around and the more fun you'll have. Aim to keep the total weight of your backpack well under 30 pounds. At the same time, you will want to take enough gear so that you can enjoy yourself in the wild for an indefinite amount of time.
My advice is to pay fanatical attention to the weight of every item that you are considering taking, no matter how small it is. Take the lightest, smallest version any item where there is a choice. Wherever possible, take items that have a dual purpose, or modify them to be dual-purpose, lighter, and/or more functional (be creative). Leave behind items that can be easily acquired once you reach your destination. Carefully consider the necessity of even the smallest item - small items add up in weight. My own gear list changes every year, as I experiment with the trade off between the weight and usefulness of various items.
Camping Gear - What to Leave Behind
- Bearspray: there are no bears on the islands. If you are worried about self-defense, take comfort in your tree saw and/or knife and/or walking stick.
- Jeans: too heavy, bulky, and slow-drying. Invest in the lightest pair of ripstop nylon pants you can buy.
- Cotton T-Shirts: too heavy and slow-drying, invest in the thinnest lightest quick-dry shirts you can buy.
- Extra clothing: clothing is the most likely place where you are likely to over-pack. Don't take more than two shirts, two pants, and two jackets (not counting underwear and accessories). Dress in layers for adjusting to different temperatures.
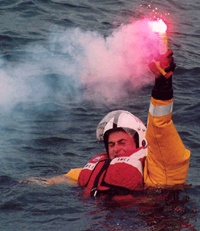
- Paranoia Gear (flares, compass, satellite radio, SPOT device, GPS): You won't need any of it. Remember, you are on an island and/or within 1 day's walking distance to civilization, or should be. Carry a whistle in the event that you injure yourself and can't walk. In general, it's pretty hard to get dangerously lost when you're on a small island. As for GPS, the environment in which you are likely to become disoriented (dense forest) is also the environment where you won't get a GPS signal.
- Axe or hatchet: a tree-saw is much lighter than an axe. Unless you are planning on building a cabin it's not necessary.
- Food: you can buy it when you get there, or get near to there. If you can't buy it there, you'll have to eventually learn to live without it anyways.
- Flint: Lighters are easier to use. Matches are your backup-item.
- Beach Towel: Any towel is overkill. A small microfiber facecloth is all you need to dry your body (Plus you can quickly wash it in any sink and wring it dry by hand).
- Deodorant: Not a good replacement for washing yourself. It's better to use your cloth to give yourself a spongebath if you're worried about the smell. Deodorant doesn't kill the bacteria, it just masks the smell, and gives you an extra layer of chemical shit to wash off.
- Waterproof Pants: I used to carry these but soon learned that it's wiser to carry a small umbrella. In light rain they are not necessary. In heavy rain they funnel all the water into your shoes. They are also a pain to put on and take off when you're not sure what's going on with the weather.
- Slingshot: Hunting is generally not allowed on the islands. Even so, I don't recall seeing squirrels or hare. Most birds and rodents are either too small to eat or too large to kill with a slingshot.
- Nalgene bottle: So much worse than than a water bottle from a grocery store (hard to cut/modify into a cup, too thick to use for solar shower, heavier, takes up more space, harder to replace, more expensive).
- Propane/gas stove and canisters: a wood burning stove is lighter and you won't need to carry around fuel. You'll also never run out of fuel, and as an added bonus the fuel is free!
- Frying pans, cups, bowls, can-opener, and cans: a single aluminum pot acts as a frying pan and bowl. Your empty water bottles act as a cup, or you can cut them in half to make a cup. Can-openers are only useful for cans, and shouldn't have cans of anything, because cans are usually filled with water-heavy food. Focus on carrying dehydrated foods such as potato powder, dried fruit, noodles, etc.
Getting to the Islands
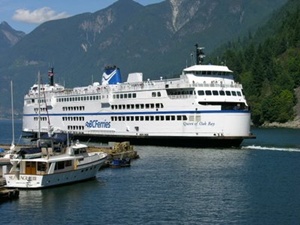
The Southern Gulf Islands (Galiano, Mayne, Pender, Saturna, Salt Spring) are accessible by BC Ferries which depart either from the mainland (Tsawassen, which is accessible by bus from Vancouver) or from Vancouver Island (Swartz Bay, which is accessible by bus from Victoria). Hornby Island is only accessible by Ferry from Denman Island. To get to Denman Island, simply take the Inland Island Highway 19 on Vancouver Island to Buckley Bay, which is ~2.5 hours from Victoria by bus or car. When you arrive at Denman island, you'll have to cross the island before catching the ferry to Hornby Island. Check the BC Ferries website for schedules and fares.
While you are on the ferries, be sure to pick up the tourist maps that they have for each of the islands. These maps highlight the locations of the main service centers (pubs, restaurants, libraries, stores, campgrounds, park areas, etc.) If you need to make overnight stays in Victoria or Vancouver, local hostels are low budget accomodations and an easy way to meet fellow travellers. In Victoria I highly recommend the Ocean Island Backpacker's Inn, where you can often work for board. In Vancouver I recommend the Cambie Hostel on Seymour Street as the cheapest clean-enough hostel. It includes a free breakfast.
Pitching Your Tent
Ask yourself the following questions before you start clearing an area for your tent:- Is the spot conveniently close to freshwater?
- Will your tent be visible to anyone that would be bothered by your presence? Is it far enough away from public paths and roads that you will not attract attention with smoke from your fire or your voice (especially if you are not tenting solo)?
- Is the spot in a depressed area on the ground where water will collect, or run through, when it rains?
- Is there a half-dead tree nearby that's leaning dangerously in your general direction? Is there anything that would prevent it from squashing you like a bug?
- Is the spot far enough away from the ocean that a high tide will not reach it, even in a storm?
- Is the spot within a one-day walking distance to a reliable food source and/or civilization?
- If tenting on a steep slope and/or below a cliff, is there some protection from tumbling rocks/boulders?
- Are there some potential places to sit and places where you can have an elevated area for cooking, brushing, shaving, etc? It's useful to have large boulders, tree stumps, or fallen logs nearby.
- Is this a place where firewood will be easy to collect?
- Is there some protection from the midday sun? UV rays, especially at higher altitudes, can damage a tent over periods of extended exposure. Your tent will also become pretty hot inside if it's exposed to the sun all day.
- Is there nearby exposure to sunlight for warming up, getting a tan, or making a solar shower (described below)?
- Is the spot likely to remain relatively dry in a downpour, or is there such an area nearby?
- Is there a bush, branch or anything else nearby to which you can tie your tent's guide-strings?
One you save selected a suitable spot, use your tree-saw to clear the area of plants, exposed roots, etc. Then use your feet to flatten out the area. Push dirt around and stomp on the ground until it's as level as possible. Ensure that there are no small stones, pine cones, or anything sharp and pointy on the ground. Once you are satisfied that the ground is flat and uniform, put your tent together and place it on the levelled area. Before you peg the tent down, get inside and roll around on the floor to test it out.
Tent Organization and Maintenance
Keep the outer wall of your tent as taunt as possible, and use whatever support cords are available to keep the outer wall as far away as possible from the inner wall. In general, you don't want the outer wall to contact the inner wall, otherwise water from the outer wall (either from rain or condensation) can run into the tent. A particular problem is keeping your down-filled sleeping bag from pushing into the walls of the tent at night and absorbing water, which tends to happen at the narrow end of the tent. A wet sleeping bag is much less effective at keeping you warm. To avoid this problem, I usually place my emptied backpack on it's side between my sleeping bag and the wall of the tent.
A full length sleeping pad is overkill since most people don't keep their bodies perfectly straight when they sleep. A half-size pad is long enough. At the base of the sleeping pad you should place some extra clothes (eg. folded pants) to create a padded area for the ends of your legs.
Insects will inevitably find their way into your clothes and your pack, and therefore your tent. Develop the habit of shaking off your jacket before going into your tent to keep out the creepy crawlies. Mosquitoes tend to buzz around the tent entrance once you are inside the tent. You can create a small demilitarized zone by spraying bug spray around the tent entrance.
You may awaken to find slugs on the walls of your tent, especially after rainy periods. This can be annoying since they leave a slime residue, but the slime can be washed off with water. I generally leave my shoes outside of my tent, but keep them tighly filled with something, to prevent slugs from making a slimey home inside them. Make it a habit to shake out your shoes in the morning before sticking your feet in them, to avoid unpleasant surprises.
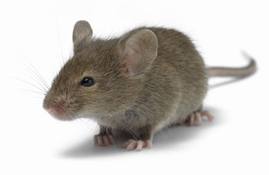
Never store food in your tent. Even if you keep your food in plastic bags, mice will smell it. After a week or two, the mice will lose fear of your tent and start to nibble through it at night to get to the food. I've learned this lesson the hard way. Always place your food in plastic bags and hang it from a branch or place it in a round icecream bucket outside your tent. Icecream buckets are thick enough to keep any smell from escaping and their round shape makes them hard to gnaw through.
When breaking camp, give your tent an opportunity to dry off before packing it up, to help prevent mildew. If you're in a hurry and your tent is wet, dry it off as much as possible using a cloth.
Fire and Cooking
If the ground is dry, collect firewood as soon as you can after pitching your tent and settling in. The worst scenario is to have rain fall before you get around to collecting firewood and stashing it in a dry place. I collect wood ranging in size from the smallest twigs to moderately sized branches, suitable for my portable wood burning stove. When collecting dead branches and twigs, always favour those still on trees rather than on the ground, since they will usually contain less moisture and burn more easily. After the wood is collected, you should store it in a place that will be remain dry even after a prolonged rainy period. I break twigs down to a thumb-length size and store them in plastic bags in a dry, elevated spot. It may not be clear which places stay the driest until after the first time it has rained.
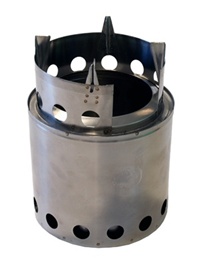
I use a portable ultralight wood burning stove (Bush Buddy) for any fire that I make, whether it's for cooking, burning small amounts of paper trash, or cheering me up on a dark night. Since it's an enclosed flame it presents no fire hazard and can be used in areas where open fires are not allowed. It's common on the Gulf Islands for open fires to be prohibited or severely restricted since an uncontrolled fire could be catastrophic for the whole island. An alternative to the Bush Buddy is to make your own hobo stove using a tin can and some youtube instructions.
Cooking with the Bush Buddy is an acquired skill. The best teacher is experience but here are some tips:
- If possible find perfectly flat rock to place under your Bush Buddy, to keep it stable.
- If possible, find an elevated area on which to place your Bush Buddy (eg. mound, flat rock) or make one, because it's more convenient than cooking on the ground.
- Carefully consider which way the wind is blowing and prepare a sitting position so that smoke doesn't blow in your face.
- Place something to the side of the Bush Buddy that the wind is blowing from that can act as a windscreen. Blocking the wind greatly increases the heating efficiency. PS - don't use your pack to block the wind, it will end up smelling like smoke.
- Prepare your firewood before starting your fire. Make three piles of twigs, ranging from very fine twigs to branches that are as thick as your fingers. Break up all your twigs so that they are as long as your index finger. Use a little tissue paper and the finest twigs to get the fire going, then start adding the larger twigs.
- The real challenge of cooking with the Bush Buddy is getting your cooking done while simultaneously keeping the fire going. You need to keep feeding the Bush Buddy with wood or you'll lose the flame.
- Wear gloves while cooking. Whatever pots/pans you place over the Bush Buddy will become covered with black soot. As soon are you are done cooking, have some moss and dirt ready to rub most of the soot form the sides and bottom of the cooking-pot, otherwise that soot it will end up on your hands and clothes.
- Another reason to wear gloves while cooking is so that you can grab the pot and reposition it, or keep it from tipping over. The Bush Buddy is not a particularly stable cooking platform.
- Have a clean surface area prepared before you start cooking. You will want a place to be able to set down your cutlery and unpackaged food without it becoming covered in dirt. I use the lid(s) of my ice cream pails or my single aluminum plate as my clean surfaces.
- When you are done cooking with the Bush Buddy, wait for the fire to die out (or douse it with water) and dispose of the ash.
Food and Refrigeration
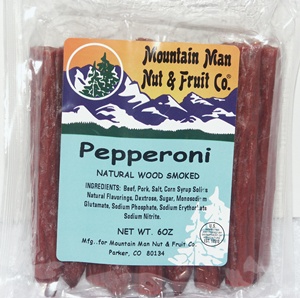
There is no need to carry a lot of food when you are moving between campsites. Once you are settled into a location, you can hit the nearest available store for provisions and/or start foraging. Of course, you'll want to focus on buying food that doesn't require refrigeration (fruit, wax-encased cheese, dried noodles, potato flakes, bread, cookies, peanut butter, Nutella, pepperoni, candybars, etc). And you'll want too avoid buying anything that comes in jars or cans - not only because they tend to be heavy, but because it's hard to dispose of jars and cans afterwards. Tip: an empty Nutella or peanut butter container is perfect for collecting berries, which will crush themselves into a speadable sloppy jam.
Knowing how to set up a refrigeration system will allow you to buy and store items such as eggs and hot dogs (eggs should be boiled to extend their lifespan). My system is to fill an ice-cream bucket 30% full of cold water from the ocean or a nearby cold steam. Then I rest my aluminum pot in the bucket. Anything that needs to be refrigerated is placed in the pot, covered with the ice cream bucket lid, and placed in a shady area. Twice a day, I replace the water in the bucket with fresh cold water.
Forage for food as much as possible, see the Foraging Guides for gathering plants, berries, mushrooms, invertebrates, and seaweed for your dinner pot. Once you've made camp, cooking a soup is the easiest and most economical way to feed youself and simultaneously sterilize the food and water you've gathered. I usually have one hot meal and one cold meal every day.
Typical hot soup: noodle pack (includes seasoning), potato powder (thickener) + whatever can be foraged (oysters, nettle, snails, limpets, etc).Typical cold meal: fruit, bread, cheese, pepperoni sticks.
Typical breakfast: bread, Nutella, water.
There is no need to fill your water bottles with sugary drinks, drink powder, etc. Sugary drinks and mixtures just complicate cleaning and preparing your water bottles and also means that the water can't be used for washing your hands. The best thirst quencher is water; if you're worried about having enough energy for the day take a candy bar.
Water Gathering, Washing and Bathing
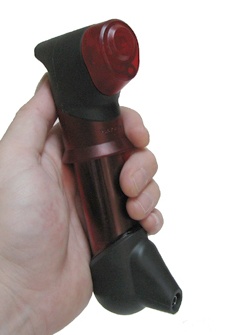
Sterilize all drinking water that you gather, preferably with a portable filter (MSR Hyperflow pictured) or by boiling. Carry water purification tablets as a backup measure. You may find it convenient to keep some non-filtered (but clear) water available for cooking soups, and save yourself the trouble of filtering it since it will be sterilized when boiling in the pot. When using a water filter, place a coffee filter over the intake hose if possible. This is an inexpensive way to prolong the life of your water filter.
Gathering and sterilizing water is a chore, and it's wise to conserve water as much as possible. Here are some tips:
Washing Hands: Don't try to pour water out of a bottle to wash your hands. There is no simple way to do this, since one hand has to hold the water bottle, and you tend to waste a lot of water. Instead, fill you mouth with water. Then squirt the water onto your hands while you rub them together.
Showering/Bathing: The best solution is to rig up a solar shower with your water bottles. Wait for a sunny day. Completely fill your water bottles and place them out in the sun, on top of a black cloth or material. If possible, find/make a surface that is tilted to face the sun directly. After a couple hours, the water will be hot enough (possibly even too hot) to pour over your head as a makeshift shower. Bathing does not need to be attempted more frequently than once every few days. If you're unlucky enough not to have sunny weather for a prolonged period, you can use your towel to give yourself a sponge bath.
Washing Clothes: A pooling freshwater stream with a rocky (rather than muddy) bottom is the ideal place to wash clothes. Detergent is not required. Washing clothes in a cold stream is not fun, so take advantage of washing machines whenever possible. Tree-sap stains can be removed with nail-polish remover.
Shellfish Foraging
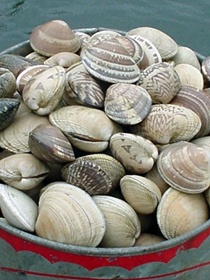 The shellfish that are easiest to forage are oysters, clams, and mussels. At certain (unpredictable) times of the year, however, shellfish may become poisonous after feeding on naturally occurring toxic algae blooms - a phenomenon known as the 'red tide'. The red tide cannot be detected by casual observation. The only way to be certain that an area is safe for collecting is to check the status of the area with the government fisheries, which monitors the safety of different areas continually. Eating even small amounts of contaminated shellfish can result in PSP (paralytic shellfish poisoning), which can be fatal in as little as 30 minutes. Cooking does not destroy the toxins and alcohol consumption accelerates the effects. Early symptoms include nausea, diarrhea, abdominal pain, tingling or burning lips, tongue, face, and impairment of breathing/moving. There is no antidote, but you should induce vomiting and seek immediate medical attention if you experience these symptoms within 30 minutes of eating shellfish. The toxin (digitalis) is a sodium channel blocker that causes muscle paralysis, and in extreme cases suffocates a victim by affecting the breathing muscles. Survivors of PSP poisoning recover fully.
Fear of PSP poisoning should not dissuade you from foraging for shellfish, as long as you follow some simple precautions. First of all, it's important to realize that different shellfish have different levels of toxicity during a red tide. Oysters are the least toxic, clams are more toxic, and mussels can be extremely toxic. The highest toxin levels ever recorded in a single oyster was just barely high enough to kill a fully grown man. Most of the toxin, however is located in gills and digestive tract of the shellfish. This makes it possible to experiment with eating a small amount of an oyster (preferably minus the gills and intestine) and waiting an hour to determine whether there is any effect. When eating oysters in an area where I am uncertain of the red tide status, I will usually boil and eat 3/4 of a small or medium sized oyster and wait an hour before proceeding with more. This technique should not be attempted with clams and (especially not) with mussels, since the toxin levels can be much higher.
You might be tempted to conclude that if oysters in a particular area are safe from PSP, then so are the clams and mussels. Although this is probably true in general, you should also know that mussels, clams and oysters are affected by a red tide at different rates, and retain the toxin in their systems for different lengths of time even after the red tide has passed. So it's possible that a red tide in the area has not yet significantly affected the oysters, but has affected the clams and mussels. My advice is to check the official status of an area before eating clams and avoid mussels altogether.
Shore Fishing
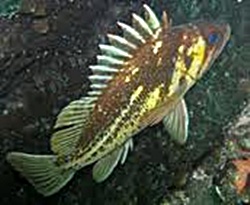
I've had good success shore fishing on the the Gulf Islands, particularly on Galiano and Saturna islands. The technique I use is jigging, but I only attempt it at locations where the odds are stacked in my favour. I look for areas where the water becomes very deep immedately offshore, and where bull kelp is growing up from the depths. It's also a good sign to see schools of minnows swimming near the surface. I perch myself on a boulder or ledge that hangs directly over the water and lower a jig straight down to the bottom, bouncing it around until I get a bite. This technique works best in remote areas where the terrain plunges straight down into the ocean, such as the shoreline below a steep or cliffy area. Use Google Maps in 'terrain' view to scout for areas with the most dramatic elevation changes right at the shoreline. The equipment you need is a fishing line, a few jigs, some small ball weights, and a tree branch or fishing rod. A reel isn't really necessary. I usually wind up catching Rockfish (pictured), but occasionally will snag a small Mackerel, Salmon, or something I can't identify. Check out the BC Tidal Waters Sport Fishing Guide for information about regulations, limits and fish identification.
After catching a rockfish it's wise to smash its head with a rock before attempting to remove the hook. Rockfish have sharp spiney fins that can jab you while the fish is flopping around. It's best to clean your fish before heading back to camp, since rinsing the mess is easiest at the shoreline. A tip for scaling your fish is to find a large rock that's covered with barnacles and rub the fish against it. Barnacles are razor sharp and easily remove the scales and slime more effectively than using a knife, which tends to send scales flying all over the place. Gut the fish, throw the head and tail back into the ocean, and carry the rest back to camp for your next meal.
Night-time
To make a pillow, place your daytime clothes into a cloth/nylon bag (I use my nylon backpack cover). Consider keeping a spare bottle in the tent dedicated as a urine bottle. You may not want to venture into the cold/rain/mosquitoes in the middle of the night to relieve yourself. The forest is a noisy place, and noticeably so when you are in the middle of a forest by yourself, blind as a bat and tied up in your sleeping bag. Deer, rodents and even small birds can sound exactly like a fugitive axe-murder to the untrained ear. And any animal scratching around right outside the tent can be unnerving. But rest assured that the islands have no animals that will attack you, and as long as you don't store food in your tent you won't have serious trouble from nocturnal animals. Put on your earplugs to block out the nightly show and get some sleep. Even so, keep your headlamp handy. I keep it around my neck when sleeping to avoid fumbling around in the dark if it's needed.